Camping Tent Setup Ideas: A Guide for Beginners
Introduction
Embarking on a camping adventure can be thrilling, but the thought of setting up a tent might seem daunting, especially if you’re new to the camping scene. Fear not! With the right camping tent setup ideas, you’ll be well-prepared to pitch your tent like a pro and enjoy the great outdoors to the fullest. In this guide, we’ll explore a variety of tips and tricks to make your camping experience comfortable, convenient, and unforgettable.
Choosing the Right Tent
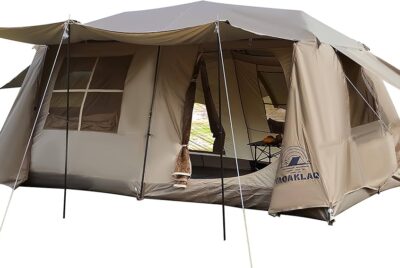
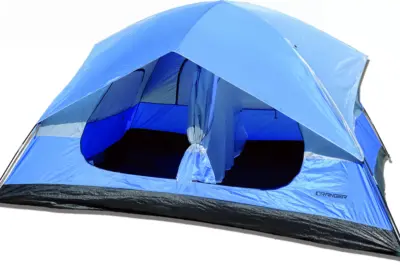
Before diving into camping tent setup ideas, it’s crucial to choose the right tent for your camping needs. Consider factors such as size, seasonality, weight, and durability. A spacious tent with good ventilation is ideal for warm weather camping, while a four-season tent provides protection against harsh elements in colder climates. Additionally, opt for a lightweight tent if you plan on backpacking to your campsite.
There are many places where you can find a wide variety of camping tents. Even if you are not yet ready to consider buying or renting a tent quite yet, browsing through some of these sites will provide you with a wealth of information about the kinds of tents and a feel for pricing. A prime marketplace for tent sales is Amazon and you might want to also take a look at some of the many places where tents are available, such as eBay, Walmart, Facebook Marketplace, and many more.
Location, Location, Location
First among camping tent setup ideas is selecting the perfect spot to pitch your tent which can significantly impact your camping experience. Look for a level, well-drained area away from potential hazards like dead trees or rocky terrain. Avoid setting up your tent at the bottom of a hill where water may collect during rain. If possible, choose a spot with natural windbreaks like bushes or trees to provide shelter from strong gusts.
Preparation and Organization
Before you begin setting up your tent, lay out all the necessary components in an organized manner. This includes tent poles, stakes, guylines, and the tent body. Familiarize yourself with the assembly instructions beforehand to streamline the setup process. Clear any debris or obstacles from the ground where you plan to pitch your tent.
Pitching Your Tent
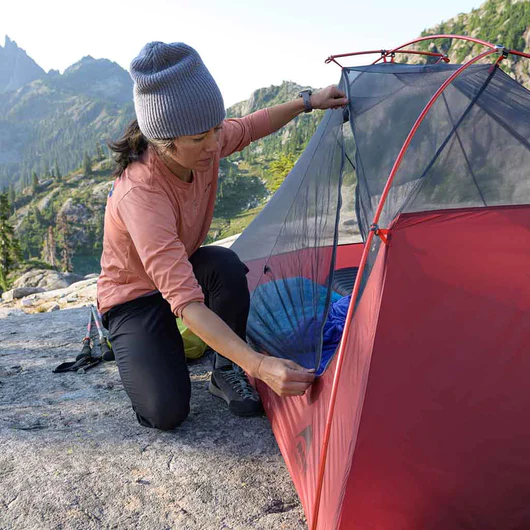
Start by laying out the tent body flat on the ground and orient it according to the desired door direction. Assemble the tent poles and insert them into the corresponding sleeves or clips on the tent body. Gently lift the poles to raise the tent structure, ensuring that the poles are securely in place. Stake down the corners of the tent to anchor it firmly to the ground.
Securing Guylines and Staking
To enhance stability and wind resistance, utilize guylines to anchor the tent to the ground. Attach guylines to the designated loops on the tent body and secure them with stakes placed at a 45-degree angle away from the tent. Tension the guylines to remove any slack and prevent the tent from swaying in the wind. Pay special attention to securing the rainfly for added protection against precipitation.
Interior Setup and Organization
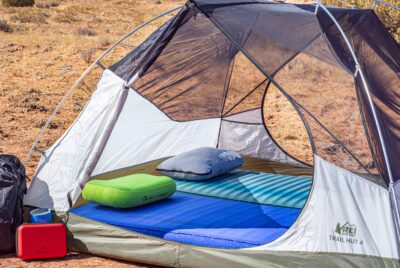
Once the tent is pitched, focus on creating a comfortable and organized interior space. Lay down a groundsheet or tarp to protect the tent floor from abrasions and moisture. Arrange sleeping bags, sleeping pads, and other gear strategically to maximize space and ensure easy access. Utilize pockets and gear lofts inside the tent to store small items like flashlights, phones, and toiletries.
Tips for Weatherproofing
Weather conditions can be unpredictable, so it’s essential to prepare for the elements. Apply seam sealer to the seams of your tent to prevent water from seeping through during rain. Use a footprint or groundsheet underneath your tent to provide an additional layer of insulation and protection. Keep ventilation openings open to minimize condensation buildup inside the tent.
Breaking Down Camp
When it’s time to pack up and move on from your campsite, follow a systematic approach to disassemble your tent. Remove stakes and guylines first, taking care to collect them and keep them organized for future use. Disassemble tent poles and collapse them according to the manufacturer’s instructions. Fold or roll the tent body tightly to minimize bulkiness and facilitate packing.
Conclusion
Setting up a camping tent doesn’t have to be intimidating, even for beginners. By following these camping tent setup ideas, you’ll be well-equipped to tackle any outdoor adventure with confidence and ease. Remember to choose the right tent for your needs, select a suitable campsite, and practice proper setup techniques for a comfortable and enjoyable camping experience.
FAQs:
How do I know if my tent is waterproof?
Most tents come with a waterproof rating, typically measured in millimeters (mm). A higher waterproof rating indicates better protection against rain. Additionally, seam-sealed seams and a durable rainfly contribute to the tent’s waterproofing capabilities.
What should I do if I encounter strong winds while camping?
If you anticipate windy conditions, choose a sheltered campsite with natural windbreaks. Securely stake down your tent using guylines and additional stakes for stability. Consider lowering the tent’s profile by removing unnecessary gear from inside.
Can I set up a tent on rocky terrain?
While it’s possible to set up a tent on rocky terrain, it may be challenging to stake it down securely. Look for flat areas between rocks and use rocks or heavy objects to anchor the tent if stakes cannot be driven into the ground.
Should I invest in a freestanding tent or one that requires staking?
Freestanding tents offer greater flexibility in terms of setup, as they can be pitched on various surfaces without relying on stakes for support. However, staked tents tend to be more stable in windy conditions. Consider your camping environment and personal preferences when choosing between the two.
How can I prevent bugs from entering my tent?
To minimize the risk of insects invading your tent, use a bug spray with DEET on yourself and your clothing. Keep tent doors and windows closed whenever possible, and consider using a mesh screen or bug netting for additional protection.


